
Monday, 25 April 2011

File size and Resolution
To change the image size or the resolution size go to the tool bar at the top and click on image, scroll down to image size and click onto it. Once you have clicked onto it a box will come up with all the measurements and you can change the resolution which i have done to my image, or you can change the pixel size or the image size.

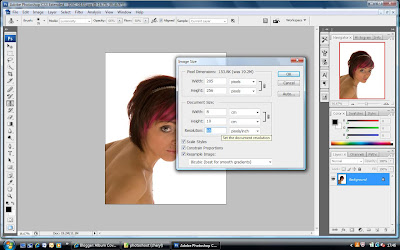

If you change the resolution to a much smaller number your image will become very pixeled, which are the blocks of colours that your images is made up off.
If you change the size off your image and blow the image up bigger the same thing will happen as you are stretching the image. These both will effect your image and sometimes it can make them look blurred and distorted., but this can be handy as if you wish to put your images onto a webpage or email them you have to change the resolution to quite a small one so that it doesnt take up to much room.
Using Quick Mask
The quick mask tool is good for when your editing your photos because it gives you better control over the areas you have selected.
To make a selection using the quick mask, press the Q key or select the quick mask icon on to tool bar.
You can preview and edit a selection in quick mask, the selection is a transparent pink colour. This helps you to see what parts you have selected and what you still need to select or even unselect.
The area which has been selected will not be effected as it has been marked, but you can edit this area by inverting your selection, this will mask off everything outside the orginal selection.
To make a selection using the quick mask, press the Q key or select the quick mask icon on to tool bar.
You can preview and edit a selection in quick mask, the selection is a transparent pink colour. This helps you to see what parts you have selected and what you still need to select or even unselect.
The area which has been selected will not be effected as it has been marked, but you can edit this area by inverting your selection, this will mask off everything outside the orginal selection.
Sunday, 24 April 2011
Cropping, Resizing and Rotaing images
Cropping
To crop an image you will need to go to the tool bar down the left hand side, click on the crop tool which is the fifth one down (the one which is highlighted). Then you click on the area and hold the left button on the mouse and to get the crop you want drag the mouse across the area and let go when your done. To make the crop press the enter button.


To crop an image you will need to go to the tool bar down the left hand side, click on the crop tool which is the fifth one down (the one which is highlighted). Then you click on the area and hold the left button on the mouse and to get the crop you want drag the mouse across the area and let go when your done. To make the crop press the enter button.

Resizing
To resize your image, go to the top tool bar and click on image, scroll down to image size and click on it. once you have clicked on it, it will bring up a box with the measurements and you can change it to the size you want as shown in the photo below. This also allows you to change the resolution of the image which is the pixel size of an image.

Rotaing
To rotate an image so that it is up the right way or at an angle slightly, you needed to go to the tool bar at the top and click on image. Once you have done that scroll down too rotate canvas, it will then give you different options of how you can rota you image these options are; 180, 90cw, 90ccw and Arbitrary. Arbitrary allows you to put in the angle of how much or how little you wish to rotate the image.


Friday, 22 April 2011
Graphic pen
To create the graphic pen effect select a photo you want to use. I have chosen this image below to add the filtler graphic pen onto. The first thing you need to do is open the photo up into photoshop.
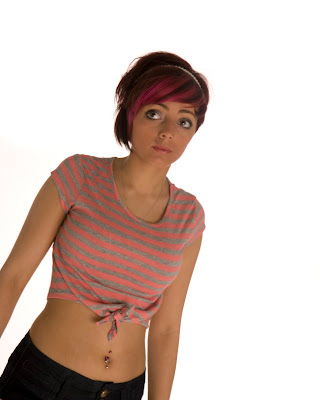

To find this filter you go onto the same setting as you would for the diffuse glow, click on filter and scroll down to sketch and then click on Graphic pen. The graphic pen also gives you the option to change and make the effect how you want it like the diffuse glow does.

this is my example of the graphic pen.

Diffuse Glow
To create the Diffuse glow select a photo you want to use. I have chosen this image below to add the filtler diffuse glow onto. The first thing you need to do is open the photo up into photoshop.


Once it is uploaded go to the tool bar at the tool and click on Filter then go down to Distort and click on the first one which is Diffuse glow, which gives this soft effect onto your image.

After you have clicked on the diffused glow it will bring up the option which is below, this allows you to alter the amount off glow, graininess and how clear it is. once you have got the glow how you want just click ok and then save you image.

This is my example of diffuse glow.

Using RAW
I took this photo on my Nikon D80 using the digital format RAW. To open this image on a computer you need photoshop, once you open your image on photoshop it will come up like the image below. This then gives you more freedom to alter your photo, for example you can edit the exposure, blacks, brightness and many more. These setting do the same as what they would if you was to change the setting on your camera at the time of taking them. by using this you can save an image if it is slightly too dark or too bright as it doesn't effect the quality of the photo.

Subscribe to:
Posts (Atom)